Just about any time you find of a friendly group of ladies that share a similar passion, you're going to ramp up the fun factor. The tuesday-schmoozeday group is no exception. A lovely group of talented craftspeople/artists host live video demonstrations/tutorials each Tuesday... free of charge... while the rest of us watch via video and chat with the group! To join in, just register and become a member of the Tuesday Schmoozeday group at Craftylink and then remember to show up on Tuesdays at the right times. I've really enjoyed learning about different products and the possibilities of how they can be applied to my own work.
You're also invited to join in at http://www.thingscrafty.com and share your crafting blogs with the rest of us in a blog hop! There are many free tutorials as well as some great classes and tutorials you can purchase. They would love to have you drop in for a visit!
And just for the fun of it, here's a photo of a large mixing bowl I painted.
First We Have Coffee
Thursday, September 27, 2012
Tuesday, September 25, 2012
Teapots
A celebration of teapots! Most of these have been sold. Just thought I'd post them here in a collection to remind myself of what I can do when I'm facing the dreaded 'block'.
The small funky teapots are made using a standard light bulb as the base.
The small funky teapots are made using a standard light bulb as the base.
Jewelry
I love how polymer clay can be used in so many applications! It's most often used to make jewelry, so I had to give that a try. That meant I had to learn a new language. What the heck is a head pin?! lol Slowly, I'm learning the terms and trying new things. Here are a few of my attempts at jewelry!
This is my "Words Matter" necklace. It's a prototype for a line that I want to make for those that have endured really hard things... traumatic things. So many hurts in this world, from the loss of a child, an adoption falling through, terrible illnesses, physical pain, rape, loss of a spouse, sibling or friend.. painful divorce and so much more. We all need words of encouragement. Words of hope. Words that remind us that life isn't all pain, but holds so much joy, too. So, for this one, I chose bright, cheerful colors and engraved words on the tiles that would have meaning to someone that has endured sexual abuse. The words chosen are also words that are significant to the meanings of each color.
On a lighter note, this necklace celebrates my son and his family. I made it for my precious daughter in law. The heart has their initials on it, while the other tiles have the names of their children. :)
Playing around with gold leaf and ink.
My husband turned the wooden part and I did the clay work on this bangle.
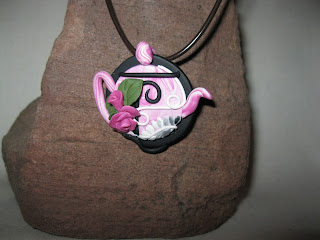
A spot of tea, anyone?
I love violas and pearls.
This is an image transfer onto polymer clay. The image is a drawing I did of a girl at a soda fountain.
Thanks for looking!
If you're wondering what to do next, how about visiting a really fun site?! Check out http://www.thingscrafty.com!
This is my "Words Matter" necklace. It's a prototype for a line that I want to make for those that have endured really hard things... traumatic things. So many hurts in this world, from the loss of a child, an adoption falling through, terrible illnesses, physical pain, rape, loss of a spouse, sibling or friend.. painful divorce and so much more. We all need words of encouragement. Words of hope. Words that remind us that life isn't all pain, but holds so much joy, too. So, for this one, I chose bright, cheerful colors and engraved words on the tiles that would have meaning to someone that has endured sexual abuse. The words chosen are also words that are significant to the meanings of each color.
On a lighter note, this necklace celebrates my son and his family. I made it for my precious daughter in law. The heart has their initials on it, while the other tiles have the names of their children. :)
Playing around with gold leaf and ink.
My husband turned the wooden part and I did the clay work on this bangle.
A spot of tea, anyone?
I love violas and pearls.
This is an image transfer onto polymer clay. The image is a drawing I did of a girl at a soda fountain.
If you're wondering what to do next, how about visiting a really fun site?! Check out http://www.thingscrafty.com!
I have a confession to make. It's something that most people that actually know me already know, but it's not something I was proud of or wanted to share with the world. I smoked. For 35 years. I started when I was 16. Sixteen was a hard (that's putting it very mildly!) time in my life and I picked up a cigarette. I found it calming and comforting and nice. I know most teens start because they think it's cool (it's not), but for me, it didn't have anything to do with being cool. It gave me something to do with my hands. It gave me something to 'do' and it seemed like the nicotine helped me concentrate. (Turns out I was right. Studies now show that it does in fact help with all sorts of things, including concentration. More about that later.)
I had a love/hate relationship with smoking. I tried to quit a whole bunch of times! And always failed. Always picked them back up. But then, last year, a good friend was given an e-cig kit for Christmas and she told me all about it after only having two cigarettes over a few days span. It intrigued me and I wanted to try it. After doing some heavy duty research and learning as much as I could about them, I decided to buy a kit and see if I could use them to cut down on smoking. I had no intention of quitting. I'd given up on quitting! But, quit is exactly what I did. I got my kit in the mail at 11:15, January 2nd, 2012 and have not touched a cigarette since. That's almost 9 months and I have no desire for a cigarette. YAY!! Needless to say... I LOVE these things. I feel so much better. My house doesn't stink. I don't stink! My cough is gone and I'm just totally thrilled! And, every smoker I know is now an ex-smoker. They now 'vape'. Ecig's are without a doubt the invention of the decades and will save millions of lives if given the chance. Seriously. Yes, it is exchanging one habit for another, but well... I switched from a habit that could (and probably would) kill me, to one that won't. Seems like a win in my book.
I hope those that are totally anti-smoking (for good reason!) will come to understand that ecigs are not anything like cigarettes. There is no smoke, which is the killer in cigarettes along with all those not so lovely carcinogens. There is nothing harmful in '2nd hand vapor'. The few trace elements found in the exhaled vapor are far, far below the FDA and OSHA requirements for safety levels. Someone breathing in the exhaled vapor will get more nicotine from eating their veggies than they will from the vapor. And besides, as I mentioned earlier, nicotine is helpful to many people for various reasons. They're using nicotine on those that have Alzheimer and dementia and ADHD. They've found it useful for depression, etc. Annnnd.. it is no more harmful than caffeine and it works much along the same line. Most people don't get upset when someone needs that cup of coffee or tea in the morning to help them wake up. Maybe as people are educated, they won't get upset about vaping either. You drink your caffeine and I'll use my ecig. Deal?
Anyway... all of that has led to a new product that we're making and I think they're so pretty! They're called 'drip tips' and they go on the end of an ecig. (That's another thing I like about ecigs... you can choose styles and make them pretty. Cigarettes are so boring! lol)
So... here are a few pictures of our drip tips. I think they're little works of art! You can see more here... http://www.molehillmountainartdriptips.com/products-page/
Sunday, November 6, 2011
Clay Box
After a week of being out of commission, I was able to finish a box I've been working on. This was a major experiment for me! I've seen such great boxes done with polymer clay, but not much info on how to achieve a nice shape. I wish I had taken pictures of the process, but for those that may be hunting for a way to do this, I'll go ahead and write it out very simply.
I used Super Sculpey for the base (just because I have a few boxes of it laying around and it seldom gets used.) I conditioned it and rolled it through the pasta machine on the thickest setting. I decided what size I wanted the box to be and cut four sides and bottom. (I did this on a flat piece of glass so I wouldn't have to move any of it, risking distorting the pieces. The glass can go into the oven for curing the clay.) Once cured and cooled, I glued the sides to the bottom and to each other. (I used Gorilla Super Glue.)You're ready to create something beautiful now by covering this base with whatever colors and design you choose!
p.s. Depending on the design of your box, you may want to cut and cure a piece to cover. I didn't go that route with mine. I wanted to try a stained glass look instead. If there's any interest, I can explain that process later.
For the finishing touch I decided I wanted a black satiny fabric interior. I cut a strip of fabric to go around the inside of the sides of the box and used Gorilla Glue to anchor it. I then cut a piece of lightweight cardboard to fit in the bottom and covered it with the fabric. I secured the back with tape because the glue wouldn't hold. Lay it in, pretty side up of course, and that's it. I think next time I'll cut cardboard for the sides as well. The glue was very difficult to work with. I glued my fingers together, to the fabric, got it on the work table and just made a huge mess. lol (The glue soaked through the fabric...) But, all in all, I'm happy with how it came out.
I'm hoping to try making a box with glass sides and mirror bottom soon, using clay at the corner seams. I'm just sure I can make it strong enough. (And I'm just sure I could be entirely wrong! But, I'll never know unless I try!) At my local True Value Store I can buy a 14"x16" sheet of glass for about $4.00 and then they'll cut it to whatever sizes I want for free. What a great deal!
Subscribe to:
Comments (Atom)


